Wednesday, August 29, 2012

Adapting a Traditional Recipe to Gluten-free, and Lemon Tea Cakes

I am always on the lookout for tasty looking and yummy recipes. I have found over the years that most of them are very easily adapted to gluten-free.

Let's say you have a family recipe that you have missed so very much since going gluten-free, something like grandmom's special cake. adapting it to be gluten free is easy. It really is! 

Much like the recipe I'm sharing today. The original recipe called for 2 1/2 cups of flour. i have found that when you adapt a wheat flour based recipe to one using gf flours, it is best to go by weight. For general purposes a full cup of wheat flour is about 140 grams. So you would measure out 350 grams of your gf cake flour blend. and depending on your baked items, you may wish to add an appropriate amount of either xanthan or guar gum.

The recipe I found today looked so yummy, I had to try them! Now I will tell you that my cake flour blend is equal parts white rice flour, tapioca flor, and then 1/2 of potato starch. For example; 1 cup each white rice and tapioca, and 1/2 cup potato starch. This I have found is best for cakes and the fluffy type baked goods.

Ok, will warn you, I fully intended to include a picture, but alas, something about blogging off of my iPad, doesn't allow me to add the picture. I do have pictures on my FaceBook page though.

And without further ado....

Lemon Tea Cakes  (adapted from Recipe.com)

1 1/2 c unsalted butter, softened
8 oz. cream cheese, softened
2 1/4 c sugar
5 eggs
3 T lemon juice
2 tsp lemon extract
1 1/2 tsp grated lemon peel
2 1/2 c, 350g flour mix
1 1/2 tsp baking powder
1 tsp gum
1/4 tsp salt
Glaze:
2 1/2 c powdered sugar
1/3 c milk or milk substitute
1 3/4 tsp lemon extract

Heat the oven to 325 degrees F. Grease or line a couple muffin tins, set aside.

In a mixer on medium speed, cream the butter, cream cheese and sugar until light and fluffy. Add eggs, one at a time, beating well after each one. Add the juice, extract and peel. Sift dry ingedients together and add to the bowl at low speed, mixing well.

Fill the muffin cups about 3/4 full and bake for 23 - 25 minutes, until done when a toothpick inserted in the middle comes out clean. Cool in pans for about 10 minutes then remove them from the tins and cool fully on a wire rack.

Make the glaze and either dip the cooled cakes into the glaze or drizzle it over the tops. place them on waxed paper till glaze hardens.

I must say these are very, very tasty, don't think they will last long! Very moist and springy.

A note though, should you decide to make 1/2 the recipe, use 3 medium eggs and 185g of flour mix. 

Monday, August 13, 2012

Squash Pickles and Summer Canning


Ah summer, when fruits and veggies are plentiful. Well that is if you take care of your gardens! And despite sharing our harvests, we end up with way more than we can eat normally. Which is ok because there are many ways to preserve all that abundance.

I have always wanted to garner the courage to can or pickle things. But I was always intimidated by the process. Bolstered on by all that I remember from my childhood of the wonderful foods my grandmother put away every year that she shared with us, I finally have waded into canning or pickling.

My first attempt earlier this summer was Rhubarb Strawberry Jam  and a batch of Rhubarb Conserve. And I had success! Now, I've finally figured out it's not all that hard, and you really don't have to have all the fancy canning equipment!. 

So onward.....

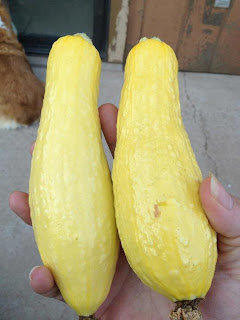
For the first time in many years, I have a vegetable garden, I've missed having one terribly and it's been a long time since I have grown all sorts of goodies! I'm growing summer yellow squash, white patty pan squash (two of my faves), beets, kale, chard, green beans, wax beans, and much more yummy stuff! However, due to planting so many plants or seeds rather, I find that I now have an extreme abundance of squash! I've shared with friends and still have more than I can eat! So..... I decided to pickle it based on memories of grandmother's pickled zucchini. I took basic recipe proportions from several ideas and this is what I came up with.

Oh, yeah, and I had one of those monsters that grew hidden, so I had to do something with it as I figured the skin would be too tough at that size!


Pickled Summer Squash, Bread and Butter style.

  • 4 lb yellow squash washed, and sliced into 1/8 to 1/4 inch thick slices, halve the slices if need be.
  • 2 large onions, halved top to bottom, then sliced
  • 1/4 cup plus 1 1/2 teaspoons coarse kosher salt
  • 1 quart crushed ice plush 2 cups ice water
  • 2 1/4 cups distilled white vinegar
  • 1 cup sugar
  • 3/4 cup water
  • 1 tablespoon mustard seeds
  • 1/4 teaspoon ground allspice
  • 1 teaspoon celery seeds
  • 1 tsp turmeric
  • 1 tsp fennel seeds
Wash and sterilize 6, pint canning jars and lids. Fill a large covered stockpot with enough water to cover several jars at a time for the boiling water bath.
 
Place sliced squash and onions in a large non-reactive bowl, sprinkle on the 1/4 cup of kosher salt, mix gently with hands. cover with ice and ice water. Cover the bowl and set aside for 3 to 4 hours to sit. 
 
In a medium non-reactive saucepan, bring the vinegar, sugar, water, mustard seeds, turmeric, fennel seeds, allspice, celery seeds, and remaining 1 1/2 teaspoons canning salt to a boil, then simmer, uncovered, 10 minutes. 
 
Bring the water in the large stockpot to a boil over medium-high to high heat. Remember that the water level will rise with each jar submerged. 
 
Drain the squash and onions and pack into the sterilized pint jars, leaving about 1/2 to 1/4 inch space to the lip of the jar. Ladle or carefully pour in the hot vinegar mixture over the squash covering the squash fully. Use a butter knife to remove air bubbles around the sides of the jars. Wipe clean the rims and threads on the jars. Place on lids and secure the bands down well. 
 
Place the jars, 3 at a time, carefully into the boiling water bath, cover the pot and boil for 10 minutes. Using jar tongs, remove each jar to cool on a towel on the counter. Repeat with the remaining 3 jars.  Allow to cool fully. And for the best flavor, let pickles sit for a week before chilling and enjoying!
You should get these yummy looking lovely yellow pickles!

Now on to my second endeavor this weekend. I love apple butter, and pumpkin butter and have always desired to make peach butter. So with the abundance of large lovely peaches this year, I dove right in to making some. 
And yeah, it's yummy!

Fresh Peach Butter


  • 4 to 4 1/2 lbs fresh washed peaches
  • 2 Tbl lime juice, fresh
  • 1 cup filtered water
  • 2 cups sugar
  • 1 tsp cinnamon
  • 1/2 tsp allspice

Halve the peaches and remove the pits. Slice wedges and cube the slices, placing them in a large stockpot. Now note, you can peel them or not, depends on if you have a food mill or a good processor.

Add the sugar and water to the peaches and bring to a boil over medium-high heat. Reduce to medium and for about 20 or so minutes, or until the peaches are extremely tender. Remove the pot from the heat and in batches, puree the peaches and liquid. Return the puree to the pot and add the lime juice, cinnamon and allspice. Bring the mixture to a simmer and let simmer 30 to 40 minutes until the mixture has thickened.

Bring a large stockpot of water to a boil (for the jar bath).

Spoon butter into sterilized jars. Clean rims and threads of the jars and add a sterilized top and screw closed. Place jars into the boiling water bath, cover and boil for 10 minutes. Using jar tongs, remove to a towel to cool fully.
This recipe makes 3, one pint jars full. Personally, I love the color I got with the beautiful red skins on my peaches. And oh yeah, it's good. I can't wait to use it in bread or on bread or french toast, or gluten-free coconut flour biscuits. I bet it's even good on Brie and crackers!

Now I don't feel as intimidated about canning, I'm looking forward to doing and trying much more, to include grandma's wonderful dilly beans. It really is a good way to preserve summer's harvest to enjoy all year.

Wednesday, August 8, 2012

Yummy stuff and 3 recipes!

First off, I greatly apologize that it has taken me a bit to get this one done. I know, I teased you all with my description of my supper last weekend. And several of you asked for the recipes.

First off, my supervisors, Abby and Brody wholeheartedly approved of my efforts at cooking over the weekend.
They are my constant supervisors, quick to pick up dropped items and make off with whatever you may have dropped faster than you can blink. And the kittens thankfully weren't trying to help me with the fish, they were pretty crashed out after trying to help with the Coconut Flour Biscuits (recipe in a later blog). The kittens are not very polite supervisors, they want to taste it all, and I fear at this stage in their lives, they think I'm a tree for scaling to try to snag any goodies they think I am preparing that they might like. Sigh.... Life is never dull, certainly when you have a few month old kitten hanging from your backside meowing loudly!

Anyhow supervisors aside, these are all gluten-free and even the vegetable casserole could probably be made dairy free using the alternative cheeses, or make a gravy with some starch in the alternative milk and some alternative cheeses. And I think you'll like the fish, so much tastier and crispier than the stuff you get frozen or from Long John Silvers. Certainly much healthier!

What I my supper consisted of, was potato crusted Swai fish fillets, a very creamy cheesy fresh vegetable casserole, and what I called Crispy Crushed potatoes. The potatoes were modified a bit from a recipe by The Pioneer Woman, which I changed some for my tastes. This is her picture so you have an idea what they should look like basically.

Here goes:

My version of Crash Hot Potatoes, which I ended up renaming Crispy Crushed Potatoes

8 to 12 new or fingerling potatoes, I prefer gold potatoes
Olive oil
Sea Salt and Pepper to taste
Herbs of choice, I like basil, chives, oregano, and or rosemary
Grated Romano or Parmesan cheese. (optional)

Boil potatoes over medium high heat until just fork tender. Times will vary based on size and amount. Drain and set aside.

Spread about 1 to 1 1/2 Tbl of olive oil around on a rimmed baking sheet or baking pan.
Put the potatoes on the oiled pan, leaving a bit of space between each of them and smash them with either a potato masher, large serving fork, or even a glass bottom works.
Drizzle a bit more olive oil over each potato, season with salt and pepper, sprinkle with your herbs, and some romano cheeses.

Bake at 450 degrees F. for 20 to 30 minutes, until they're golden and crispy around the edges. Serve!


Creamy Cheesy Vegetable Casserole

1/2 lb fresh broccoli, florets cut off and halved if larger than bite sized
1/2 lb fresh cauliflower, florets cut off and halved if large
1 large carrot, sliced 1/4 inch thick slices
1/2 lb sliced mushrooms (optional)
1 medium onion, sliced vertically in half and then sliced moderately thin
Sea salt and pepper to taste
1 clove minced garlic
1 1/2 cups mixed shredded cheeses, like cheddar, swiss, asadero, jack, your choices
1/2 cup sliced oxaca (mexican farmers cheese) or provolone, (4 to 5 slices)
1 to 1 1/2 Tbl coconut or olive oil
1/2 cup milk or coconut milk

Grease a covered casserole with coconut oil and add chopped vegetables to the dish and set aside.

Heat oil in a skillet over medium heat and add onions, saute till browned and crispy, stirring occasionally. Remove from heat and set aside.

In a saucepan over medium heat, heat the milk and add the shredded cheeses, stirring constantly until the cheeses are melted and gooey, and you have a thick smooth cheese sauce. Stir in the garlic and salt and pepper.

Pour the cheese sauce over the vegetables. Spread the crisped onions over the top, and top with the sliced cheese. Cover and bake at 350 degrees F for 40 minutes, or until vegetables are just tender. Remove lid and bake another 5 to 10 minutes until the top is golden and bubbly. Remove from oven and let sit 10 to 15 minutes before serving.

Potato Crusted Fish Fillets

2 to 3 Swai or Tilapia fish fillets, rinsed and patted dry
2 to 3 Tbl of potato starch
1/4 cup milk or milk substitute
1 to 1 1/2 cups potato flakes
lemon pepper to taste
1 to 2 Tbl Olive oil for frying

Place starch on a plate or in one ziploc bag, the potato flakes and lemon pepper on or in another plate/bag.
Pour milk into a shallow dish.
Dredge the fillet in the starch, shake of excess and then dip in the milk, and then dredge in the potato flakes. Place fillets on a plate and chill for 15 to 30 minutes to firm up.
Heat the oil in a skillet over medium heat. Fry fillets until golden on both sides and fish flakes easily with a fork. About 5 to 7 minutes per side depending on the thickness of the fillet. Remove to a paper towel lined plate and pat off any excess oil. Serve with your favorite topping or sauce. I usually make my own tartar sauce with mayo and some sweet or dill relish, or get fancy and make a tartar sauce with roasted chopped green chili and a little onion salt, New Mexican Style!

Yes supper was that easy, and very tasty.